
Crafty Christmas Countdown
I love making the days leading up to Christmas special and meaningful with traditional books movies and treats and experiences that we return to year after year. One of my favorite traditions is a countdown full of daily activities/projects.
We’ve done many different variations on this over the years (a science experiment option was definitely a favorite for my STEM-loving kiddo).
This year, while cleaning out or art/craft supply cupboard, I realized that I have PLENTY of supplies on hand to create my own Crafty Christmas Countdown using (mostly) only things we have on hand. Follow along on Instagram as I share a video each day of the projects we’re creating and I’ll come back to update this post as the days progress! You can also find the whole playlist here
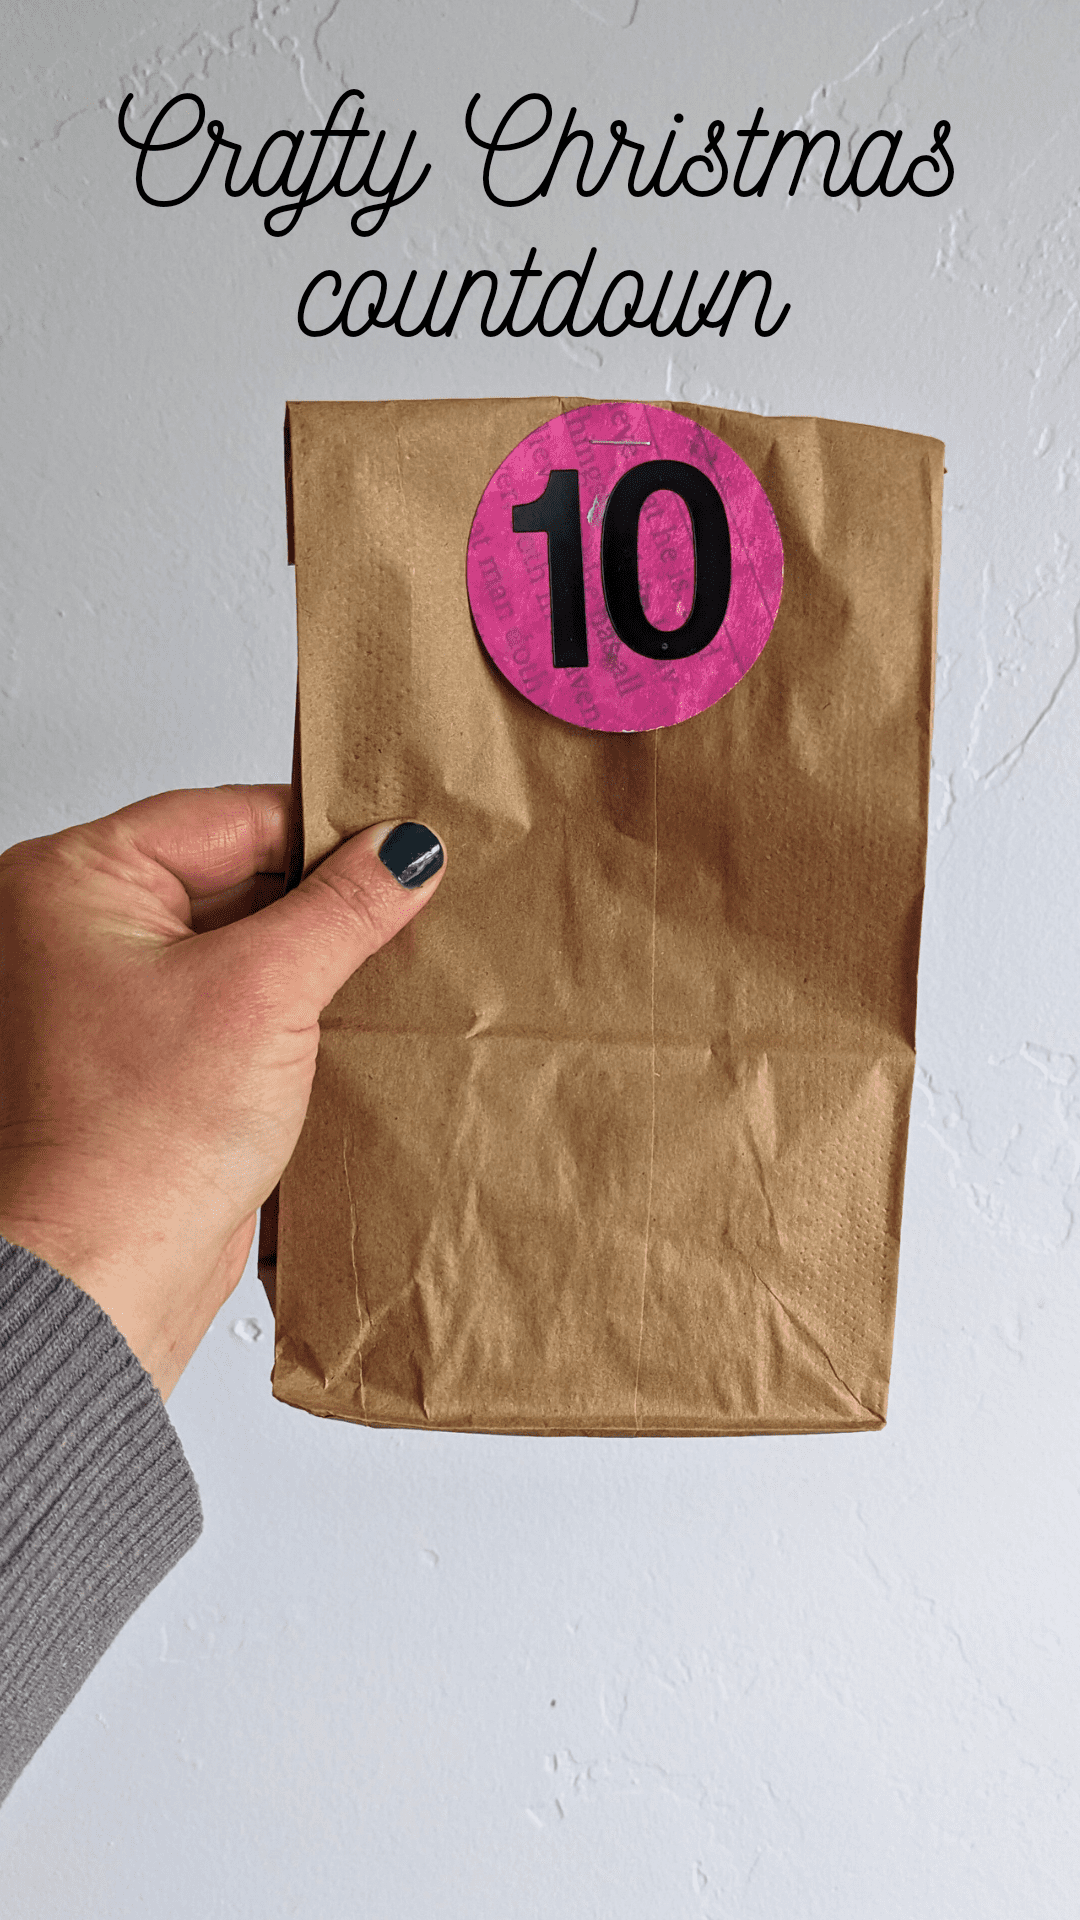
DIY Crafty Countdown Prep
I need projects like this to be as simple as possible. I’m a homeshooling/working mom after all. I created tags using gelli-printed paper, stickers and paper sacks I had on hand. I put all the supplies for each project into the bags and labeled them (being sure to choose easy projects for days we have a lot on the calendar).
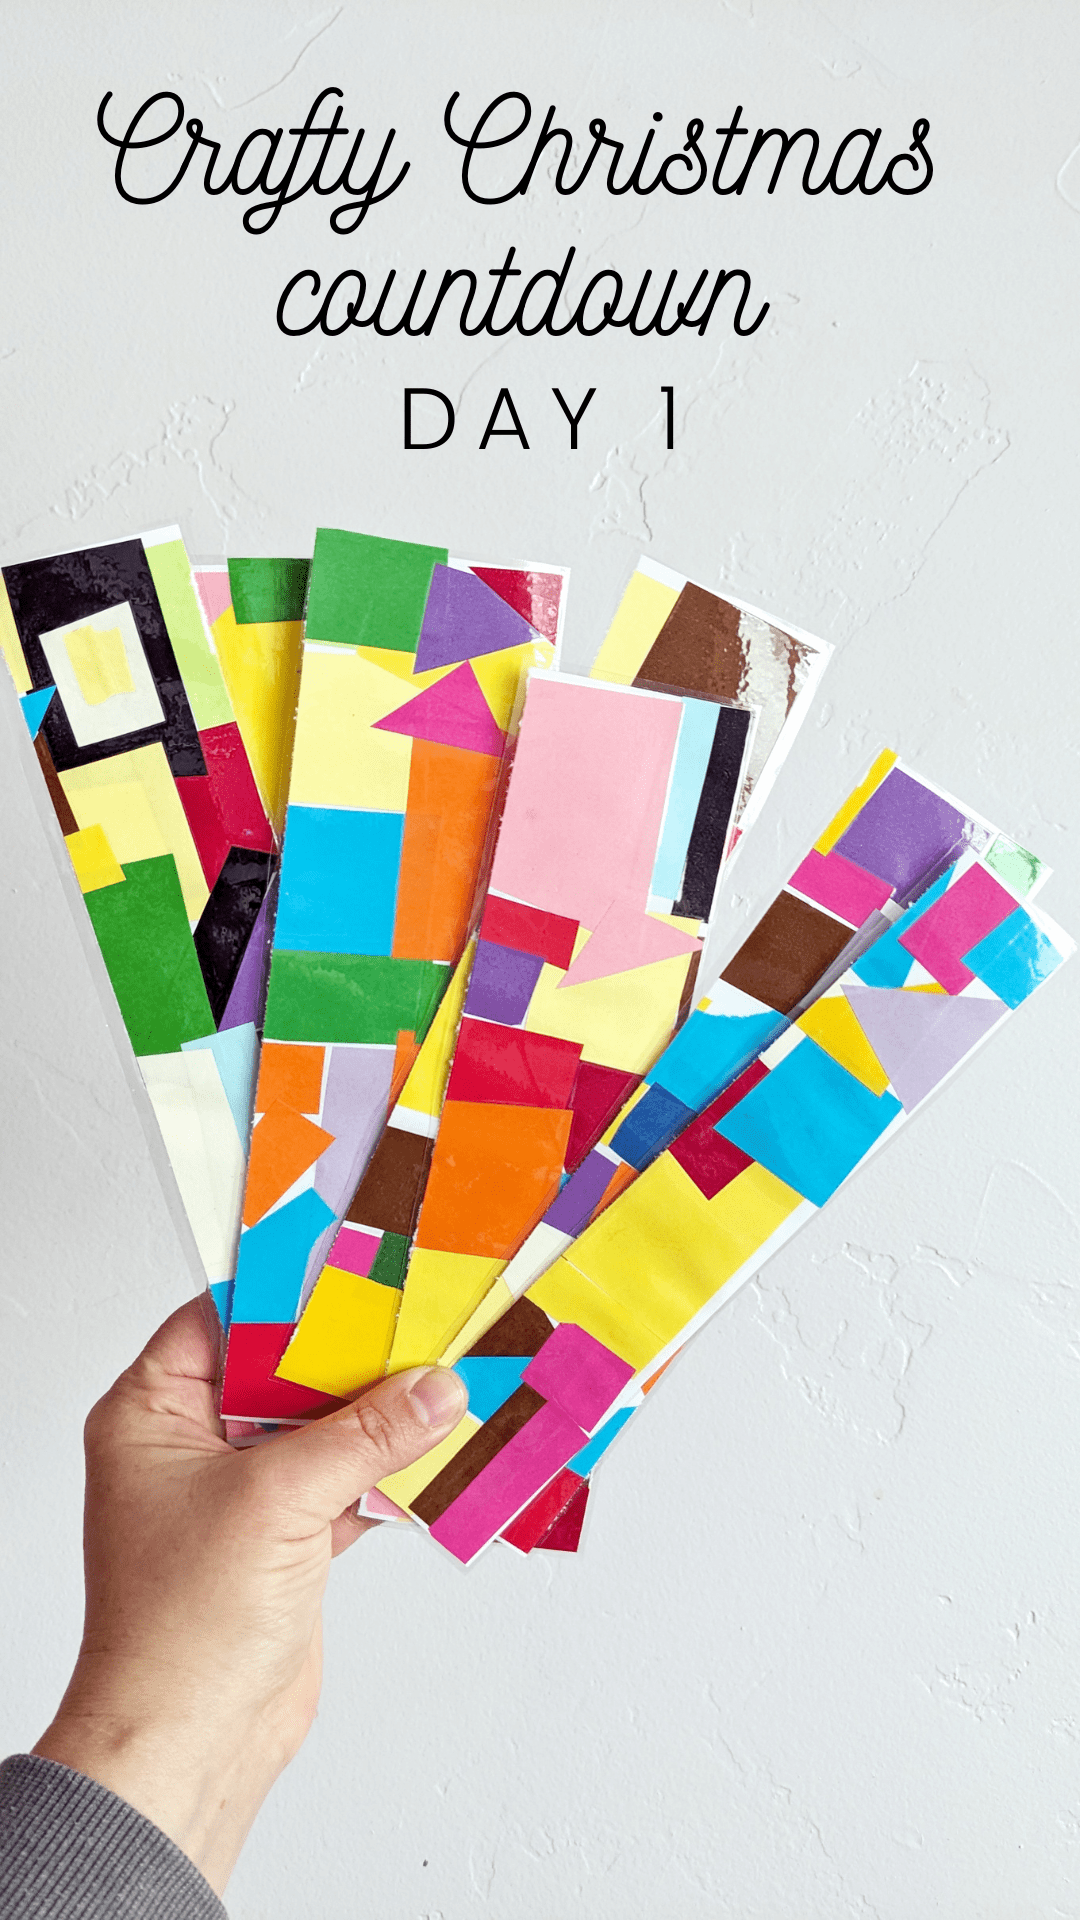
Day 1: Laminated Bookmarks
I had a bag of pre-cut geometric shapes of various bright colors left over from a project with my elementary art students. We glued the shapes down onto a legal size paper (though of course any paper will work). We cut the collages down to bookmark size using my paper cutter (this one is similar) and then laminated them. These sheets are a fantastic price and great quality; this is the newer version of our beloved laminator).
One of my goals with the Crafty Christmas Countdown is to have gifts ready for my kids to give to their teachers, friends and loved ones and these handmade bookmarks will make a perfect gift for anyone on their list!
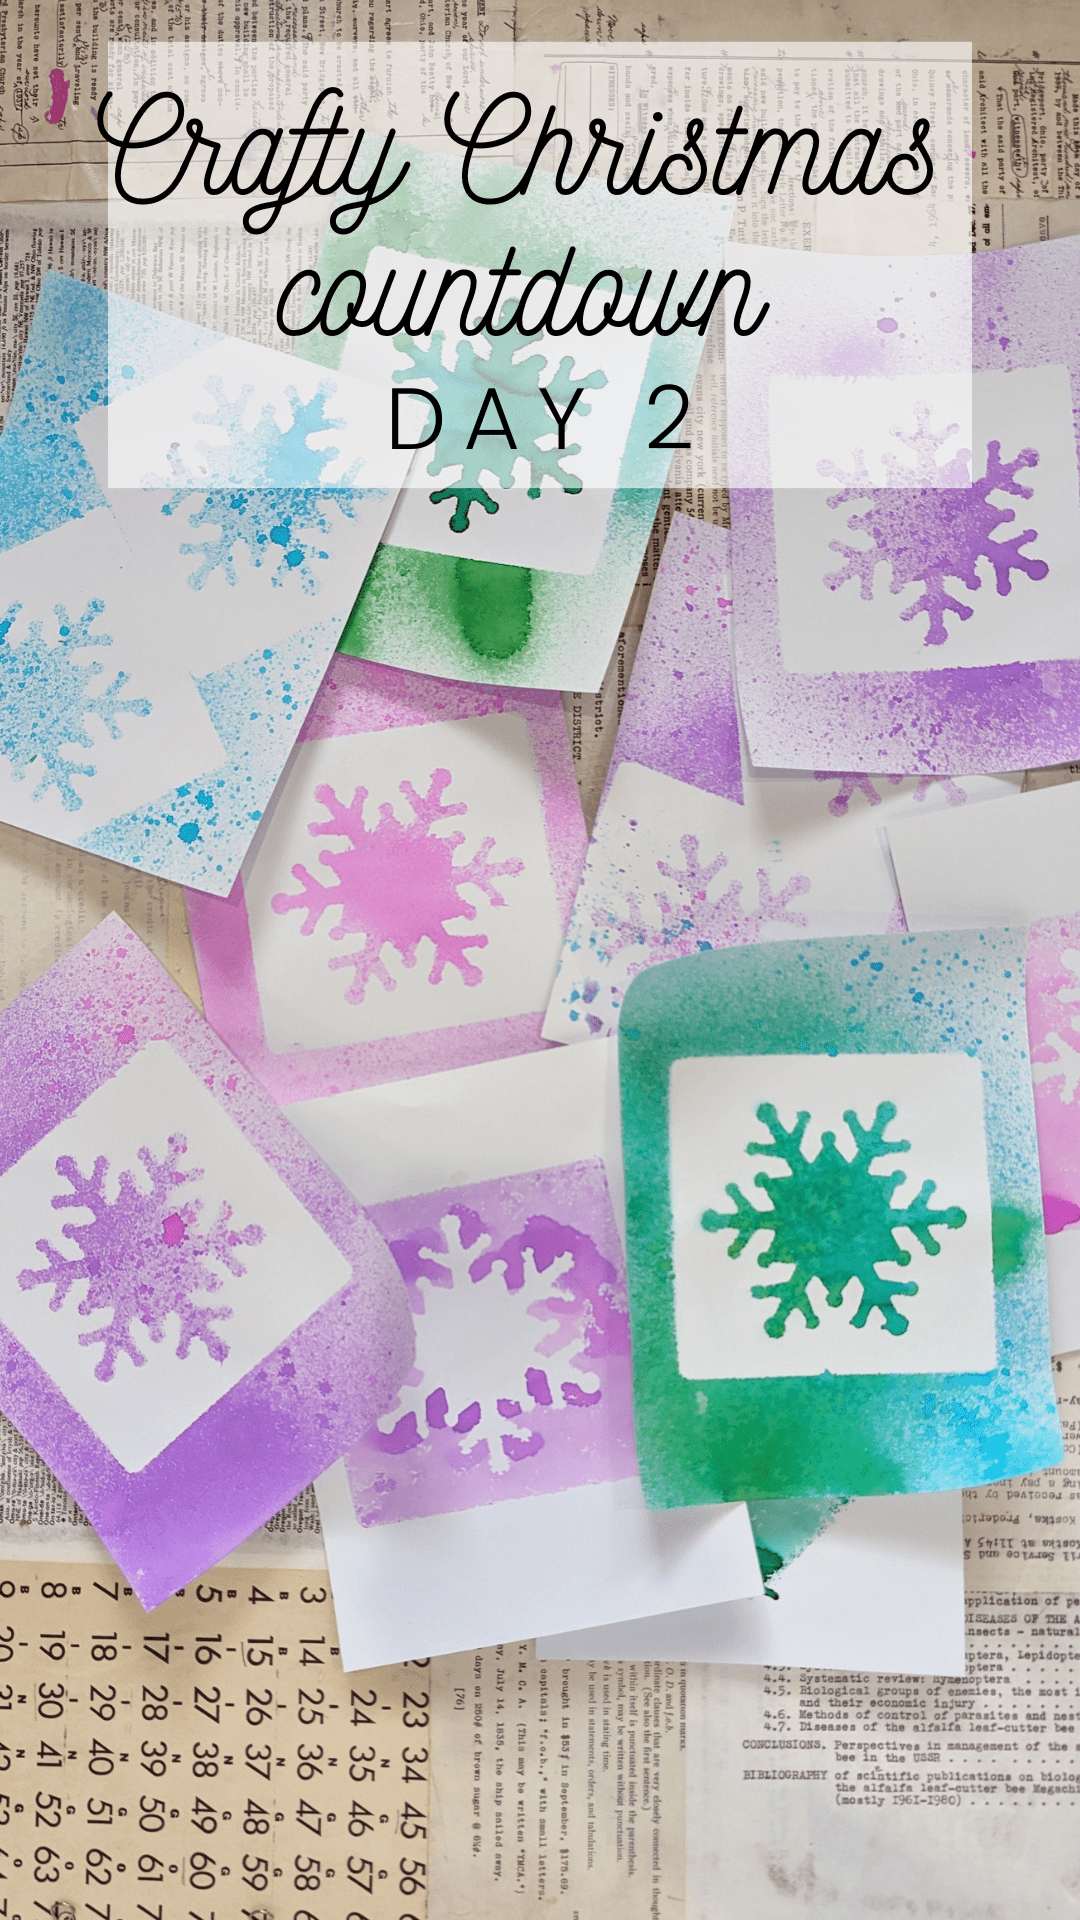
Day 2: Stencils + Liquid Watercolor
This project, in many forms, is ALWAYS a hit. Liquid watercolors and stencils are very easy and fast and make a very satisfying and simply gorgeous end result. We used a simple stencil we had on hand. This stencil set would be so beautiful. We used these liquid watercolors which are very vibrant and have a great selection of colors (warning: they say washable but some of the colors definitely stain clothes/skin) and these spray bottles.
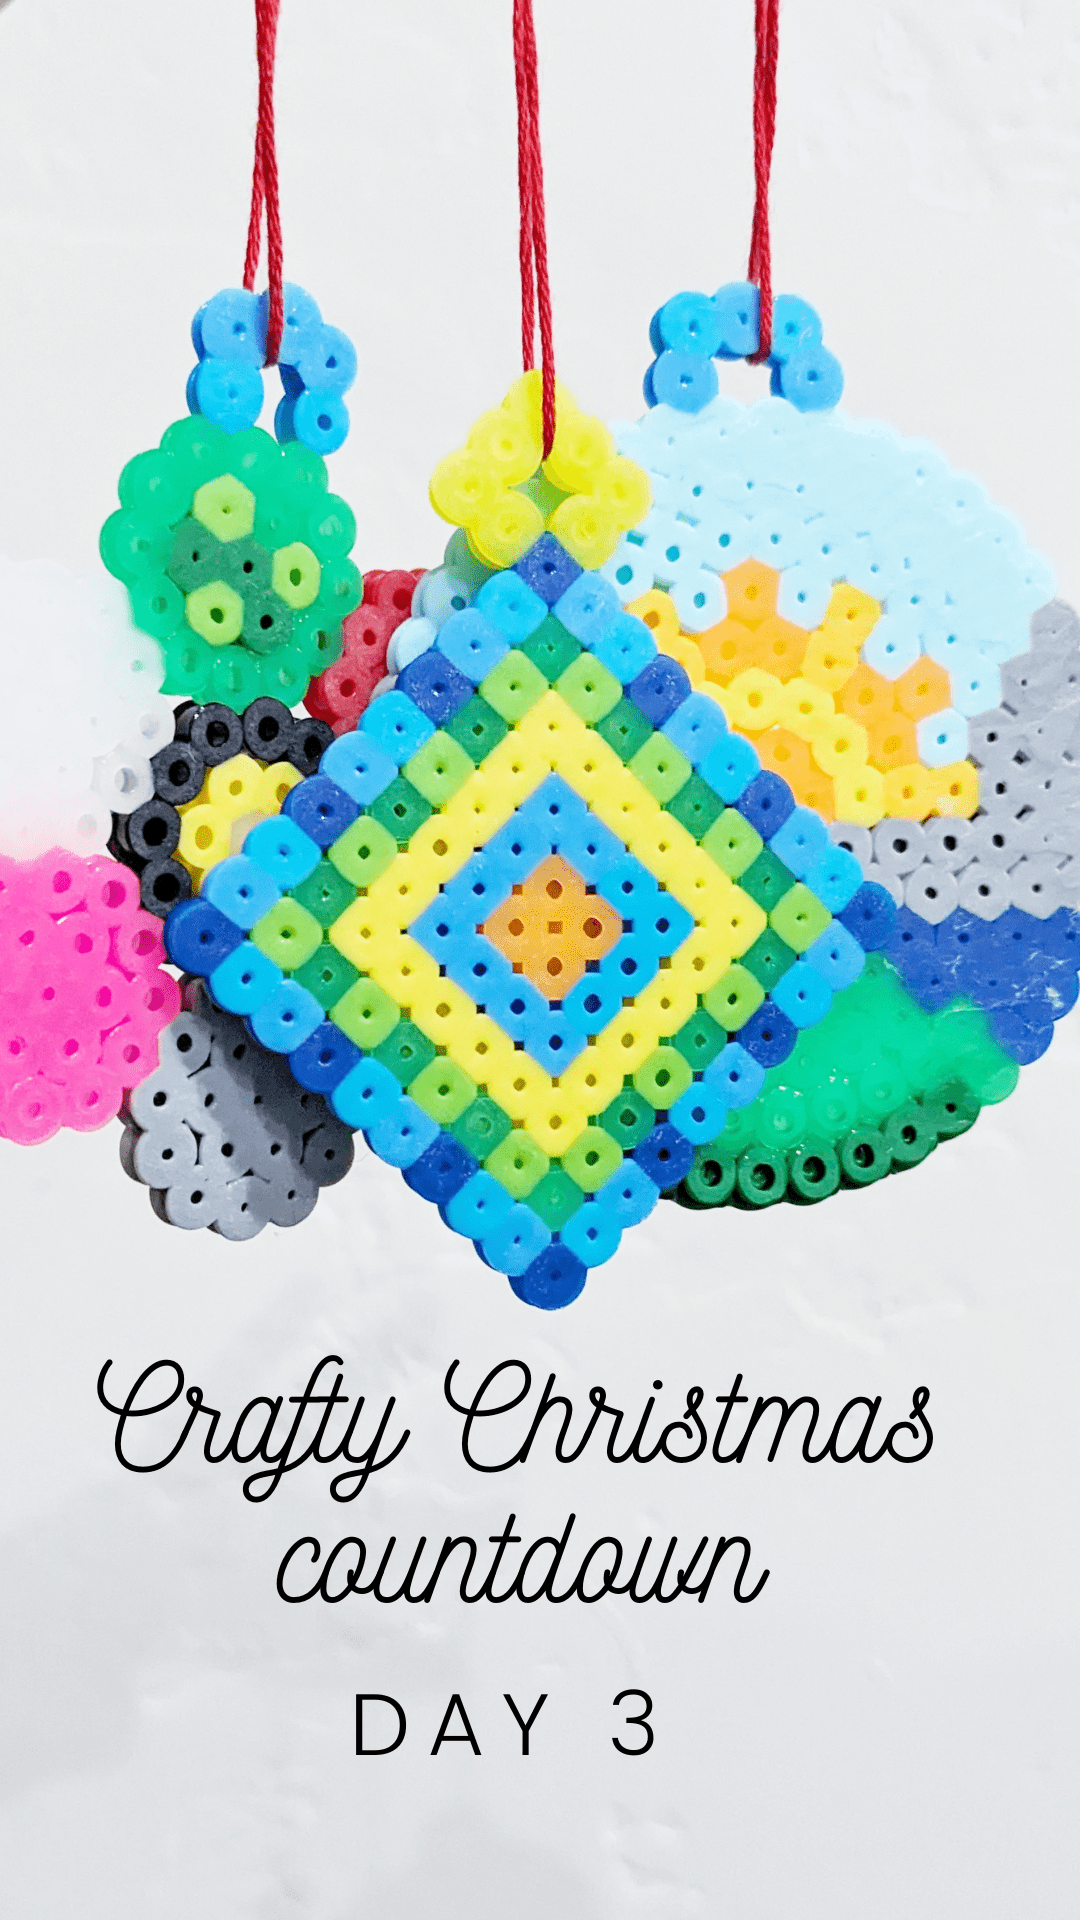
Day 3: Perler Beads
For day three, we went with the Old Faithful of Kids Crafts: Perler Beads with a tray pack we’ve had for years.
My favorite Perler Bead tip is to give each person a paper plat full of beads to work from. This makes the beads easy to see and work with while you’re creating and clean up is very easy as well. You just need to fold the paper plate and dump the beads back into the container.
One other tip: we added a loop to make hanging the perler bead creations even easier!